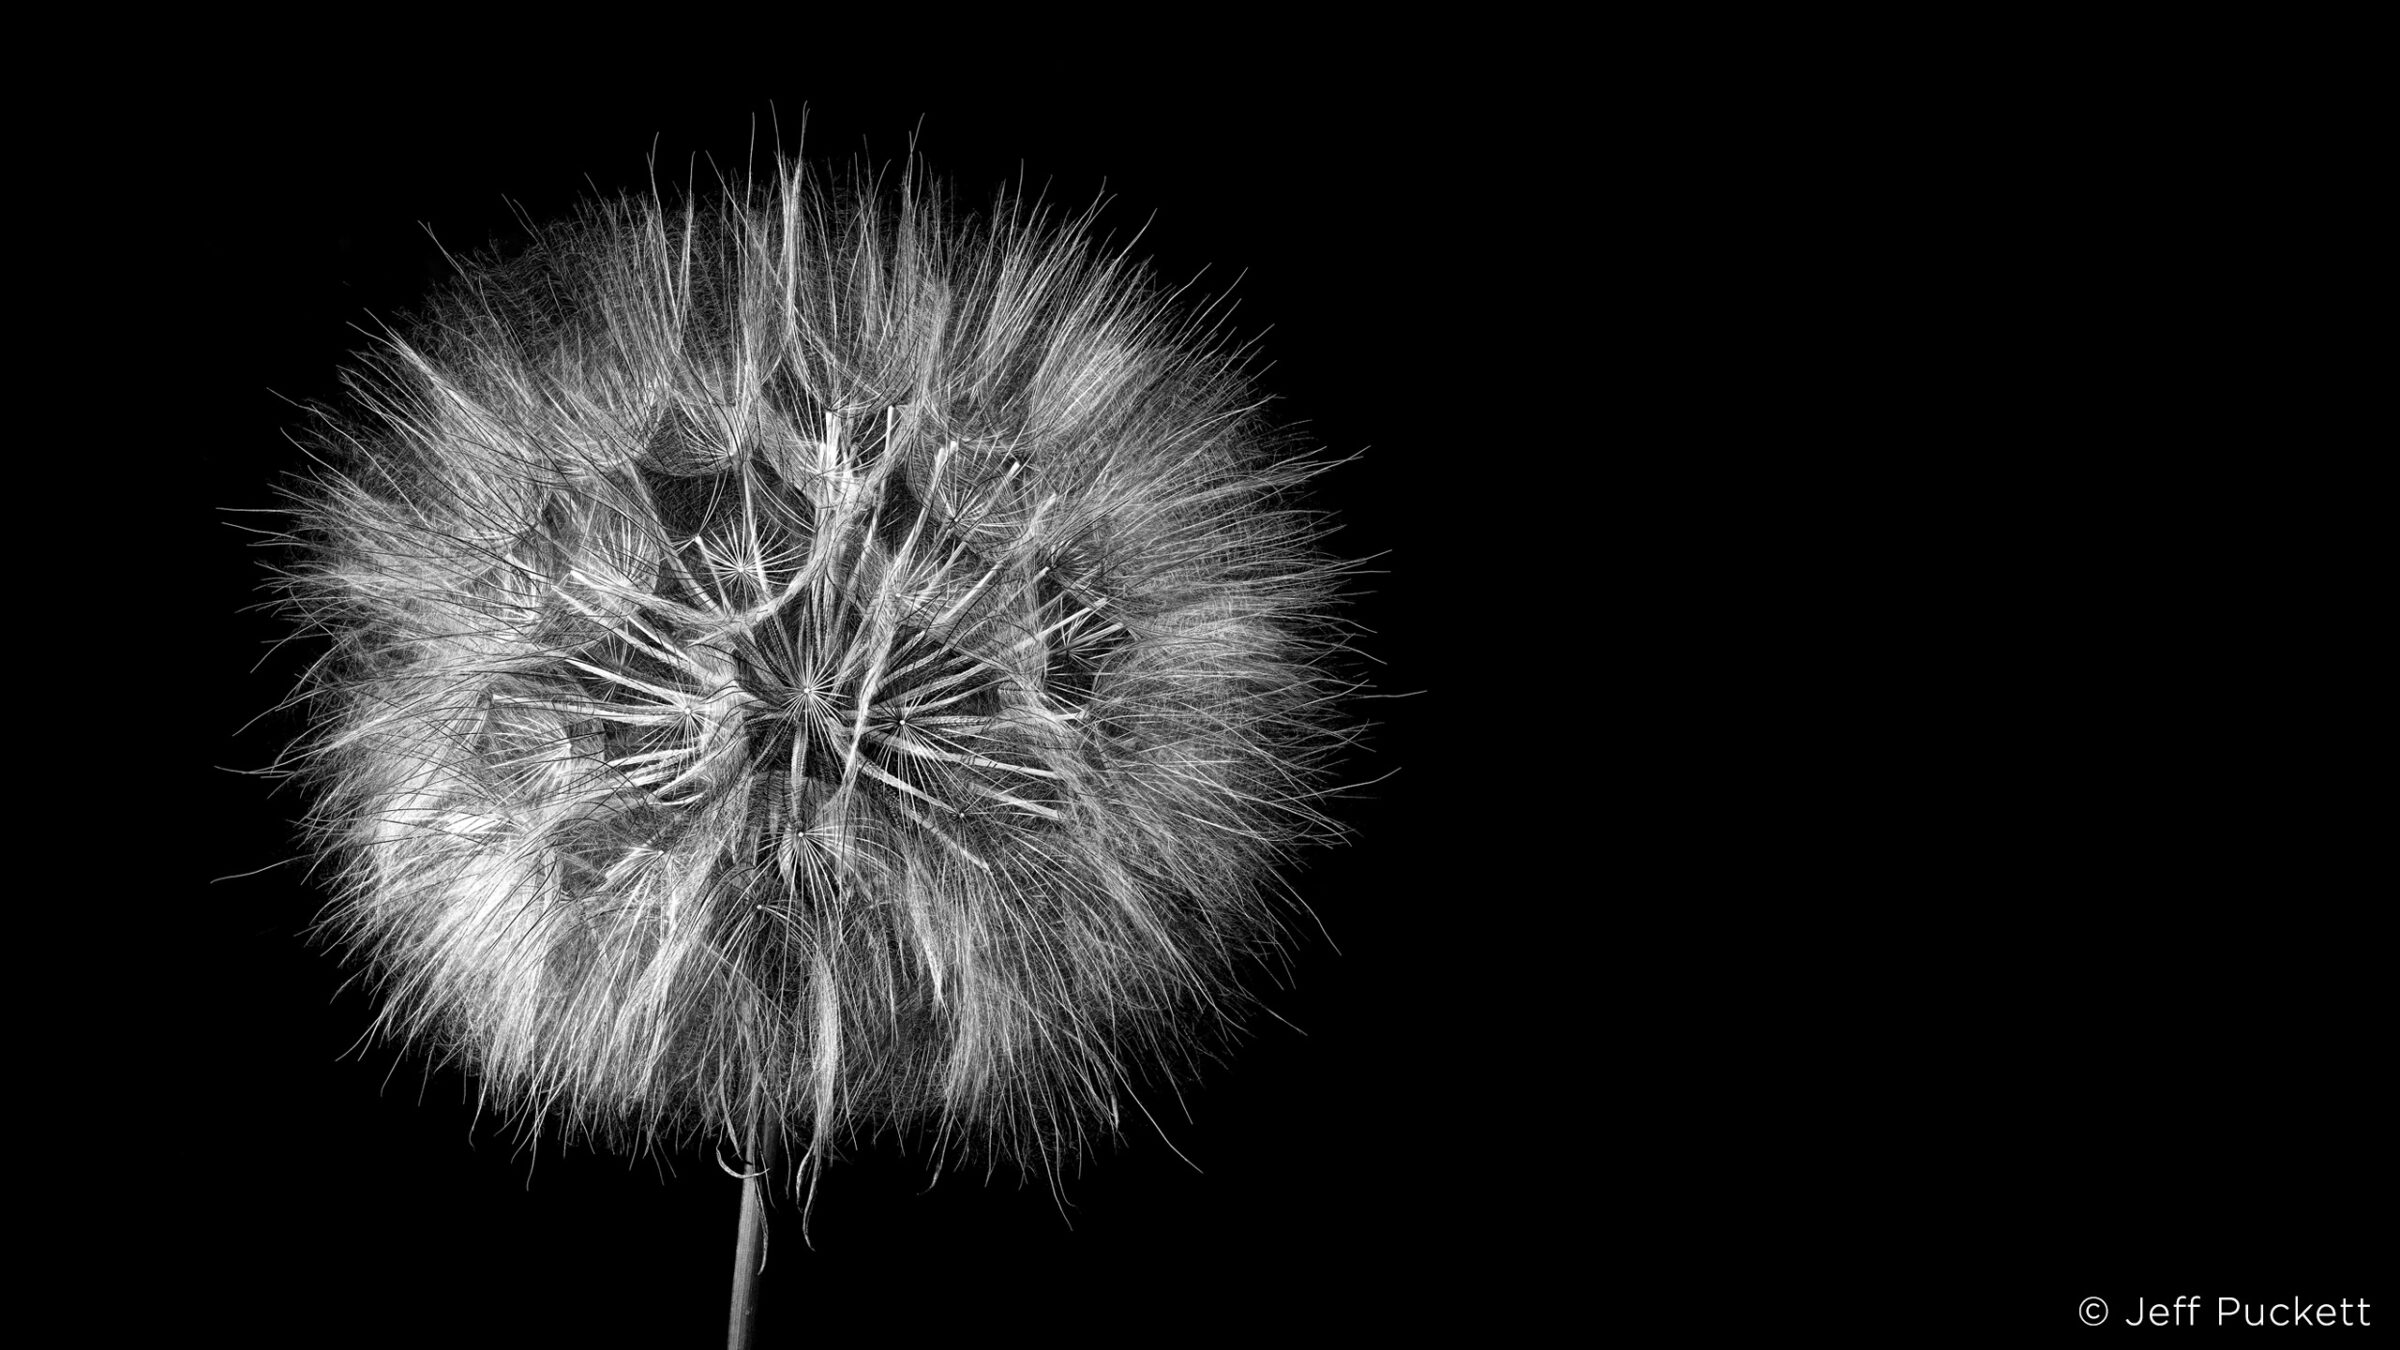
Jeff Puckett
The Art of Photogravure
How did you get started in photography? Was it always an interest?
I was introduced to photography at twelve years old. A neighborhood buddy had a dark room in his basement and a 35mm Pentax. He taught me how to use the camera (apperture, shutter speed, depth of field, film speed, etc). He also taught me how to develop the black and white film we were shooting, and print the negatives using his old Durst enlarger. Fondly I don’t think the smell of the stop bath will ever leave my nose. I’ve shot some color over the years, but have always gone right back to black and white.
How did you get into photogravure? Who/what were your inspirations?
I became interested in Platinum/Paladium printing prior to Photogravure. I did a one on one P/P workshop with a great printer and teacher, Don Messec , in Santa Fe. He also is a true master of Photogravure. After learning the basics of Platinum/Paladium, I journeyed out to Topsham, VT to pick up a UV light box from Jon Cone at Cone Editions. I’d planned to complete another week of Platinum work there when I spotted his printing press. I asked him what it was for, and Jon said, “oh, that’s my happy place,” Well, I thought happy sounds good to me. So we spent the week working on Photogravure. I was smitten and purchased an American French press from Conrad Machine Co. After another week working with Jon Cone, I was hooked.
Please describe the Photogravure process.
The Photogravure process is a great combination of modern digital technology and printing techniques from the late 1800’s. Plus, the archival stability of Photogravure is said to be 400+ years.
I use Phase One cameras for the image capture. Then, using my Epson printer, I print a negative of the image onto a metal photopolymer plate. Next, the plate is exposed in a UV exposure box. Then it is “developed” with a water rinse, where the printer ink is cleared from the plate – no nasty chemicals. Afterwards, it’s blotted dry, hit a bit with a blow drier, then placed into a heat box for 30 minutes. It’s then exposed to UV again. The plate is now fully developed, fully etched and ready to ink by hand.
I use Charbonnel Etching Ink. This process is an art unto itself. The ink is rubbed into the plate, filling the various depths of the etched plate with ink. By using different wiping pressure, and techniques, I’m able to accomplish some “dodging and burning” – like in the old darkroom. The inked plate and paper (that’s been soaked in water and blotted dry) are aligned on the press bed, covered with three, thin felt blankets, and pulled through the press using the large “captains wheel.”
The actual moment I pull that print off the plate is the best moment of all! The newly pulled print is then placed between blotting paper and into a drying press. After a few days of drying…Ta Da!
Where/how did you first hear about Phase One?
I had a bit of time on my hands during the pandemic. I had just sold a business, and was interested in spending more time on my photography addiction. With a few billion photographers out there taking photos with smart phones, I wanted to do work that was different and set apart from the norm. Equipment wise, I have used 35 mm, medium format Hasselblad, and 4×5 view cameras. I knew I wanted a camera that created big files (8”x10” negative type files), with great resolution and dynamic range. I dug in and researched the options for months. I read everything I could on the internet, read Phase One Blogs, and spoke to other photographers that were making images I thought were special. I also became a bit addicted to watching videos of Phase One gurus Drew Altdoerffer and Lau Norgaard. The Phase One system kept rising to the top.
Photogravure and Phase One
What difference does it make that you’re using a Phase One image with photogravure?
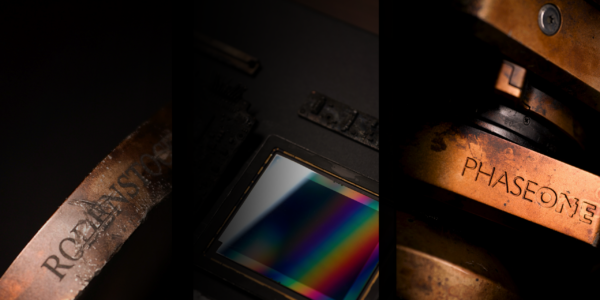
I would say that traditional Photogravure of the past was a bit softer than the prints with which I end up. I’m sure that some of that has to do with the photopolymer plates I use, versus using copper etched plates. My prints are very sharp and incredibly detailed. There is a certain richness and depth that is produced in a gravure. I think the biggest reason however, are the files from which I’m printing. There is zero doubt that the incredible resolution that comes out of the 151 megapixel sensor of the Phase One IQ4 back is a huge contributor. Combine that with the top of the heap Rodenstock and Schneider lenses, and you end up with prints with so much depth that you feel like you can reach into them. Another addition to the Phase One secret sauce that I’m using, is the IQ4 150 Achromatic digital back. By removing the bayer color filter and the infrared cut filter above the sensor, Phase One has expanded the resolution and dynamic range that can be achieved. I also like that it restricts me to just B&W. If I want to shoot color, I would just switch over to the color IQ4. But I don’t, so I won’t.
Are there any particular Phase One camera features or techniques that you find helpful?
I have found that certain subjects I photograph lend themselves better to either the Phase One XF or the XT. I love to use the XF with still life situations and portraiture. My favorite feature of the XF is its ability to easily focus stack images. I simply pick the near focus and far focus points, and the camera does the rest of the work. Those files are easily combined in Helicon Focus software and processed. From there I process the image in Capture One and a bit of Photoshop tweaking.
The XT is the absolute perfect field camera for any landscape and architectural photography. My favorite and often used features used on the XT are Dual Exposure Plus and Frame Averaging. The ease of creating crazy good, long exposures with Frame Averaging and the focus stacking festure were reasons enough for me to go with Phase One. Add on the IQ4 and Schneider and Rodenstock lenses and feel like I have the perfect system for me. Although pricey, Phase One provides me all updates as they are developed. I feel like I get a new camera with new capabilities, without having to take my wallet out again. That’s comforting.
Your subjects are wide-ranging. How do you choose them?
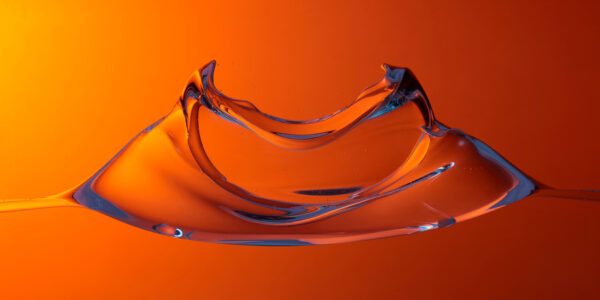
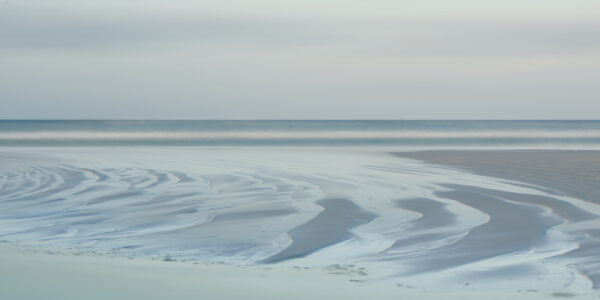
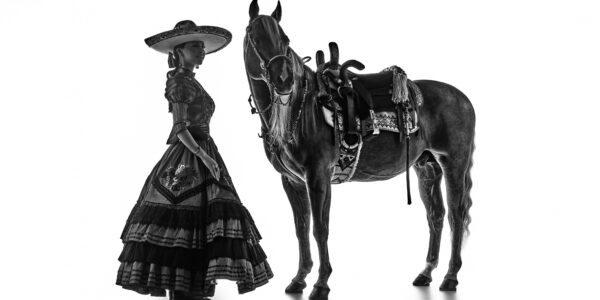
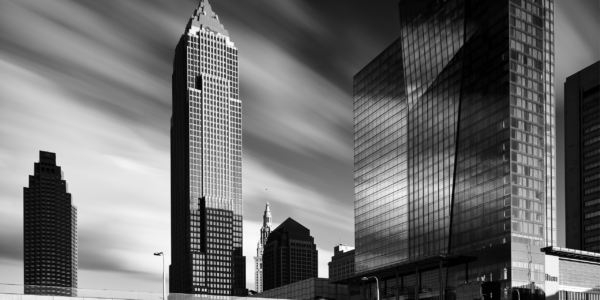
I’ve never been a photographer that really sticks with a particular genre of photography. Maybe to my detriment. I guess I have a “focus issues” (pun not intended). This is definitely the antithesis of most of the well known photographers past and present. I photograph things that interest me, and which, I think, will look good as a monochromatic image. I’m afraid I would get bored sticking with just one genre. I’m pretty sure my images would suffer too. I probably have a bent for Still Life (ish) images that include items with unique form and function. My Phase One XF is the perfect tool for these. I also love landscape, where my XT then becomes the tool of the day.

Photographer Stories
Sandro Gamba – Beautiful food, passionate photography
Photographer Stories
Nike x SKIMS ‘Bodies At Work’ by Rob Woodcox
Photographer Stories
From vision to print: How Louise brings stories to life with medium format part 2
Photographer Stories
Intimacy in focus: Louise’s lens on humanity with Phase One part 1
Photographer Stories
Dimitri Newman: Vision is Just the Start
Photographer Stories
Ashes: The Rebirth of a Camera- Hexmalo
Photographer Stories
Chandler Williams: A Photographer’s Path
Photographer Stories
TABO- Gods of Light
Photographer Stories
Loreto Villarreal – An Evolving Vision
Photographer Stories
Tobias Meier – Storytelling Photography
Photographer Stories
Gregory Essayan – Curating Reality
Photographer Stories
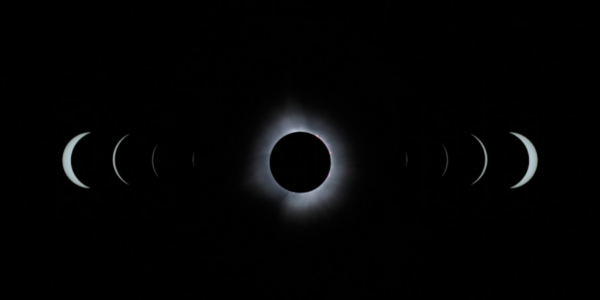
Total Solar Eclipse – Matthew C. Ng
Photographer Stories
Roger Mastroianni – Frame Averaging
Photographer Stories
Matthew Plexman – Bringing portraits to life
Photographer Stories
Prakash Patel – A Visual Design Story